A braided ponytail is the rare hairstyle that works as hard as you do — polished enough for a wedding, practical enough for the gym, and pretty enough for every photo in between. The magic is in the braid itself: a Dutch braid adds edge, a fishtail adds romance, a bubble braid adds playful volume. Below are 15 braided ponytail ideas with real, specific styling guidance — which braid to use, how to build it step by step, who it flatters, and where to wear it.
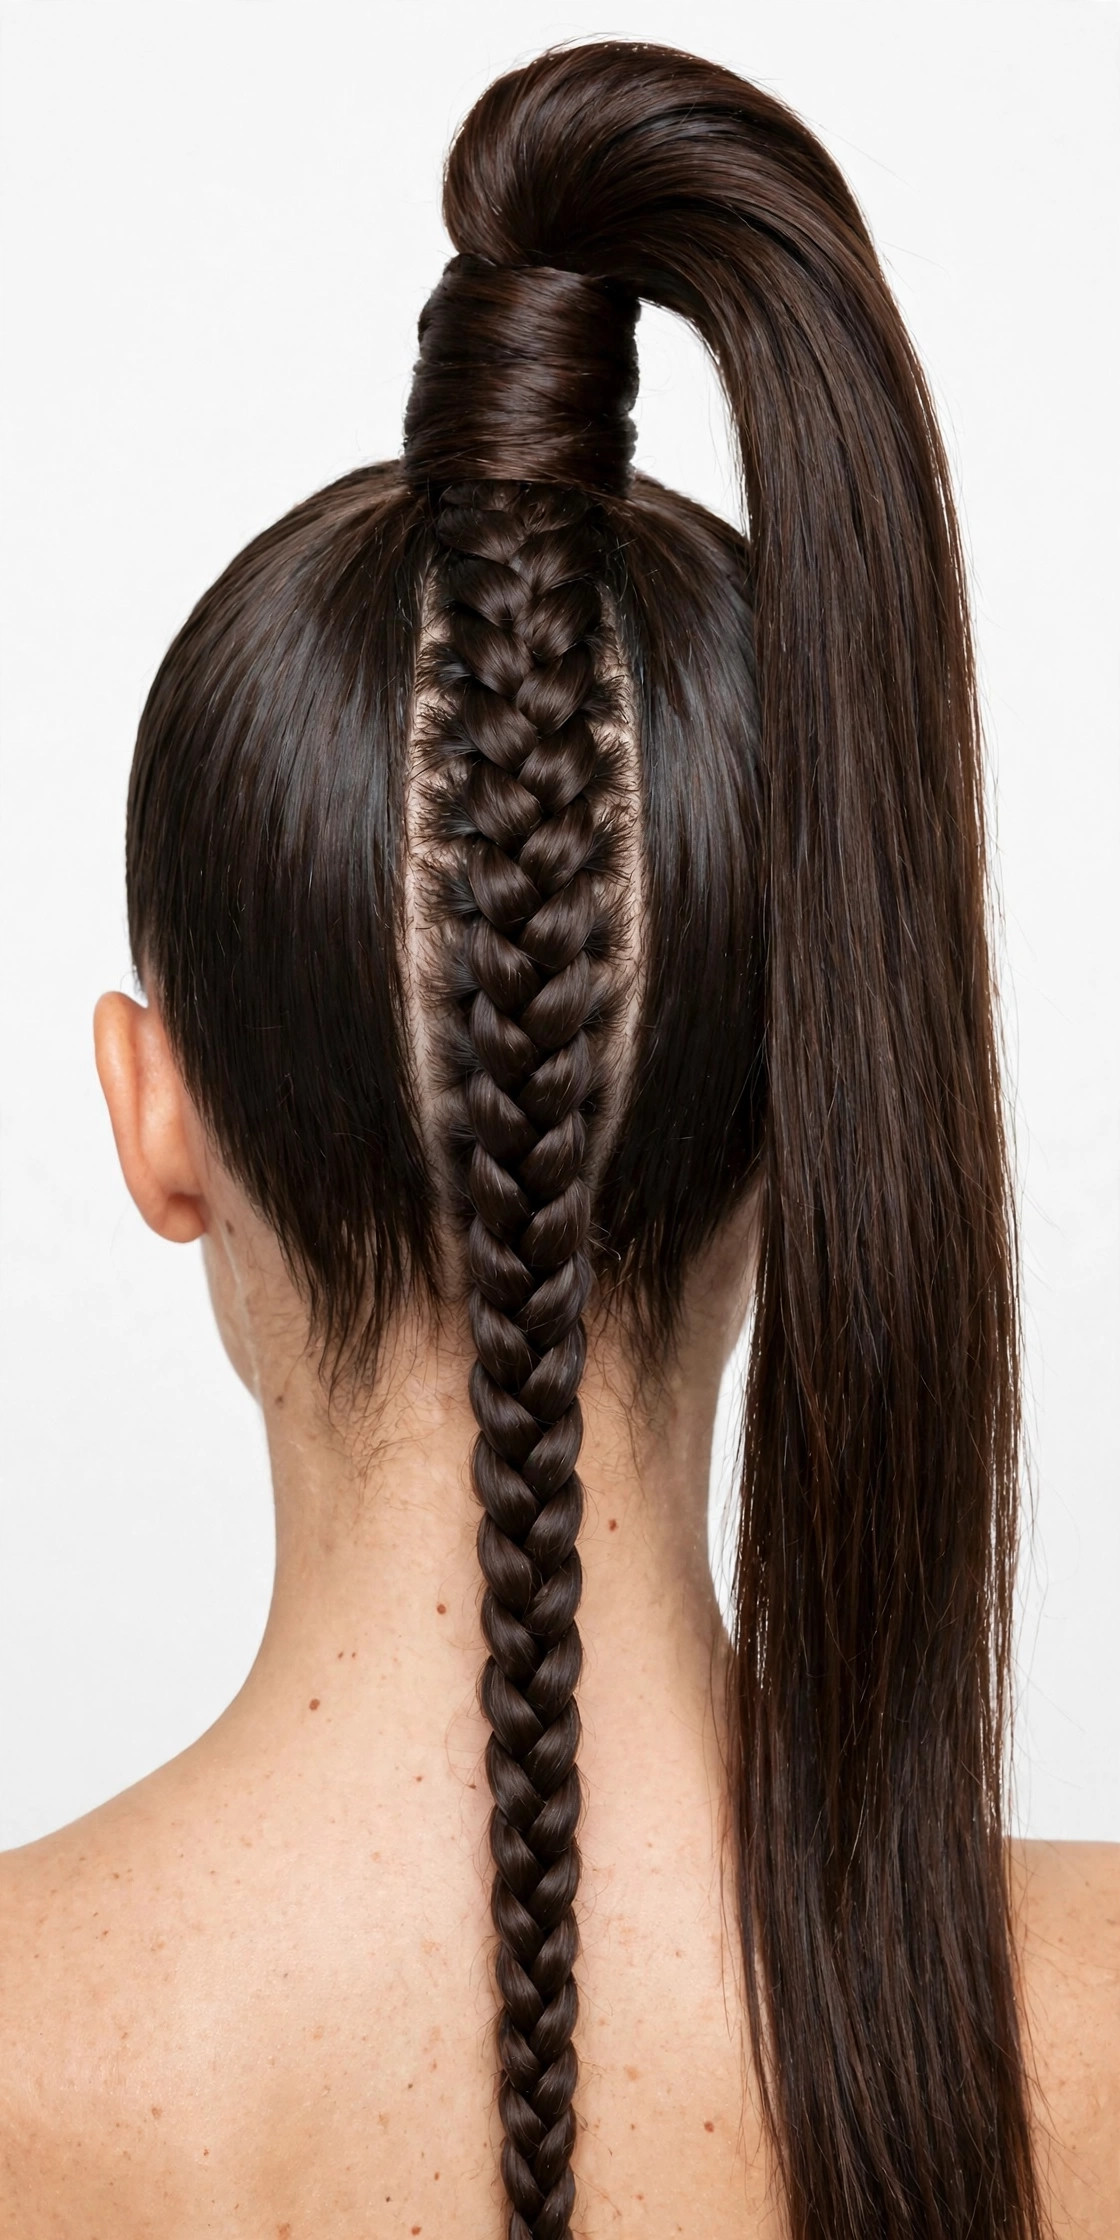
1. The Sleek High Dutch Braid Ponytail
This is the power version of the braided ponytail: hair pulled tight and high, with a Dutch braid (the “inside-out” French braid, where strands cross under instead of over) running from the hairline straight back into a sky-high ponytail. The Dutch technique is what makes the braid sit on top of the hair instead of sinking in, so it reads bold and graphic from every angle. It suits oval, round, and heart-shaped faces beautifully because the height elongates the face, and it’s the go-to for workouts, dance performances, and long days when you need hair completely out of the way.
To build it, start with brushed, slightly damp hair and a smoothing serum. Flip your head upside down and brush everything toward the crown. Starting at the front hairline, Dutch-braid straight back — cross each side strand under the middle, adding hair as you go — stopping at the crown. Secure with a clear elastic, then gather everything (including the braid tail) into a high ponytail and wrap a strand of hair around the elastic to hide it. Variation: pancake the braid by gently tugging the edges wider for a thicker, more dramatic look.

2. The Fishtail Braid Ponytail
A fishtail braid ponytail trades the classic three-strand braid for the intricate, herringbone-like fishtail — two sections woven by pulling small pieces from the outside of each section to the inside of the other. The result looks far more complicated than it is, and the fine woven texture photographs beautifully. It flatters long and oval faces especially well, and it shines at outdoor weddings, festivals, and date nights where you want romance without fussiness.
The key is working with small sections: the thinner the pieces you cross over, the more detailed the fishtail looks. Start with a mid-height ponytail (a texturizing spray gives grip), split it in two, and weave down, keeping tension even. Tie off with a clear elastic about two inches from the ends, then gently pull the braid apart widthwise for that full, lived-in fishtail. Variation: start the fishtail only halfway down the ponytail, leaving the top smooth for a modern, undone contrast.

3. The Bubble Braid Ponytail
The bubble braid ponytail is the easiest “braid” on this list — no actual braiding required. You secure a high or mid ponytail, then place elastics every two inches down its length and puff out the hair between them into rounded “bubbles.” It creates instant volume and a fun, fashion-forward silhouette that works on fine hair (it fakes thickness brilliantly) and suits round faces by adding vertical length. It’s a favorite for concerts, theme parks, and game days.
For the cleanest bubbles, use clear mini elastics and tease each section lightly before puffing. Wrap a small strand of hair around every elastic to hide them — this single step is what separates a polished bubble braid from a playground look. Variation: make it a double bubble braid with two side ponytails, or add a Dutch braid at the crown leading into the bubbles for a hybrid style.
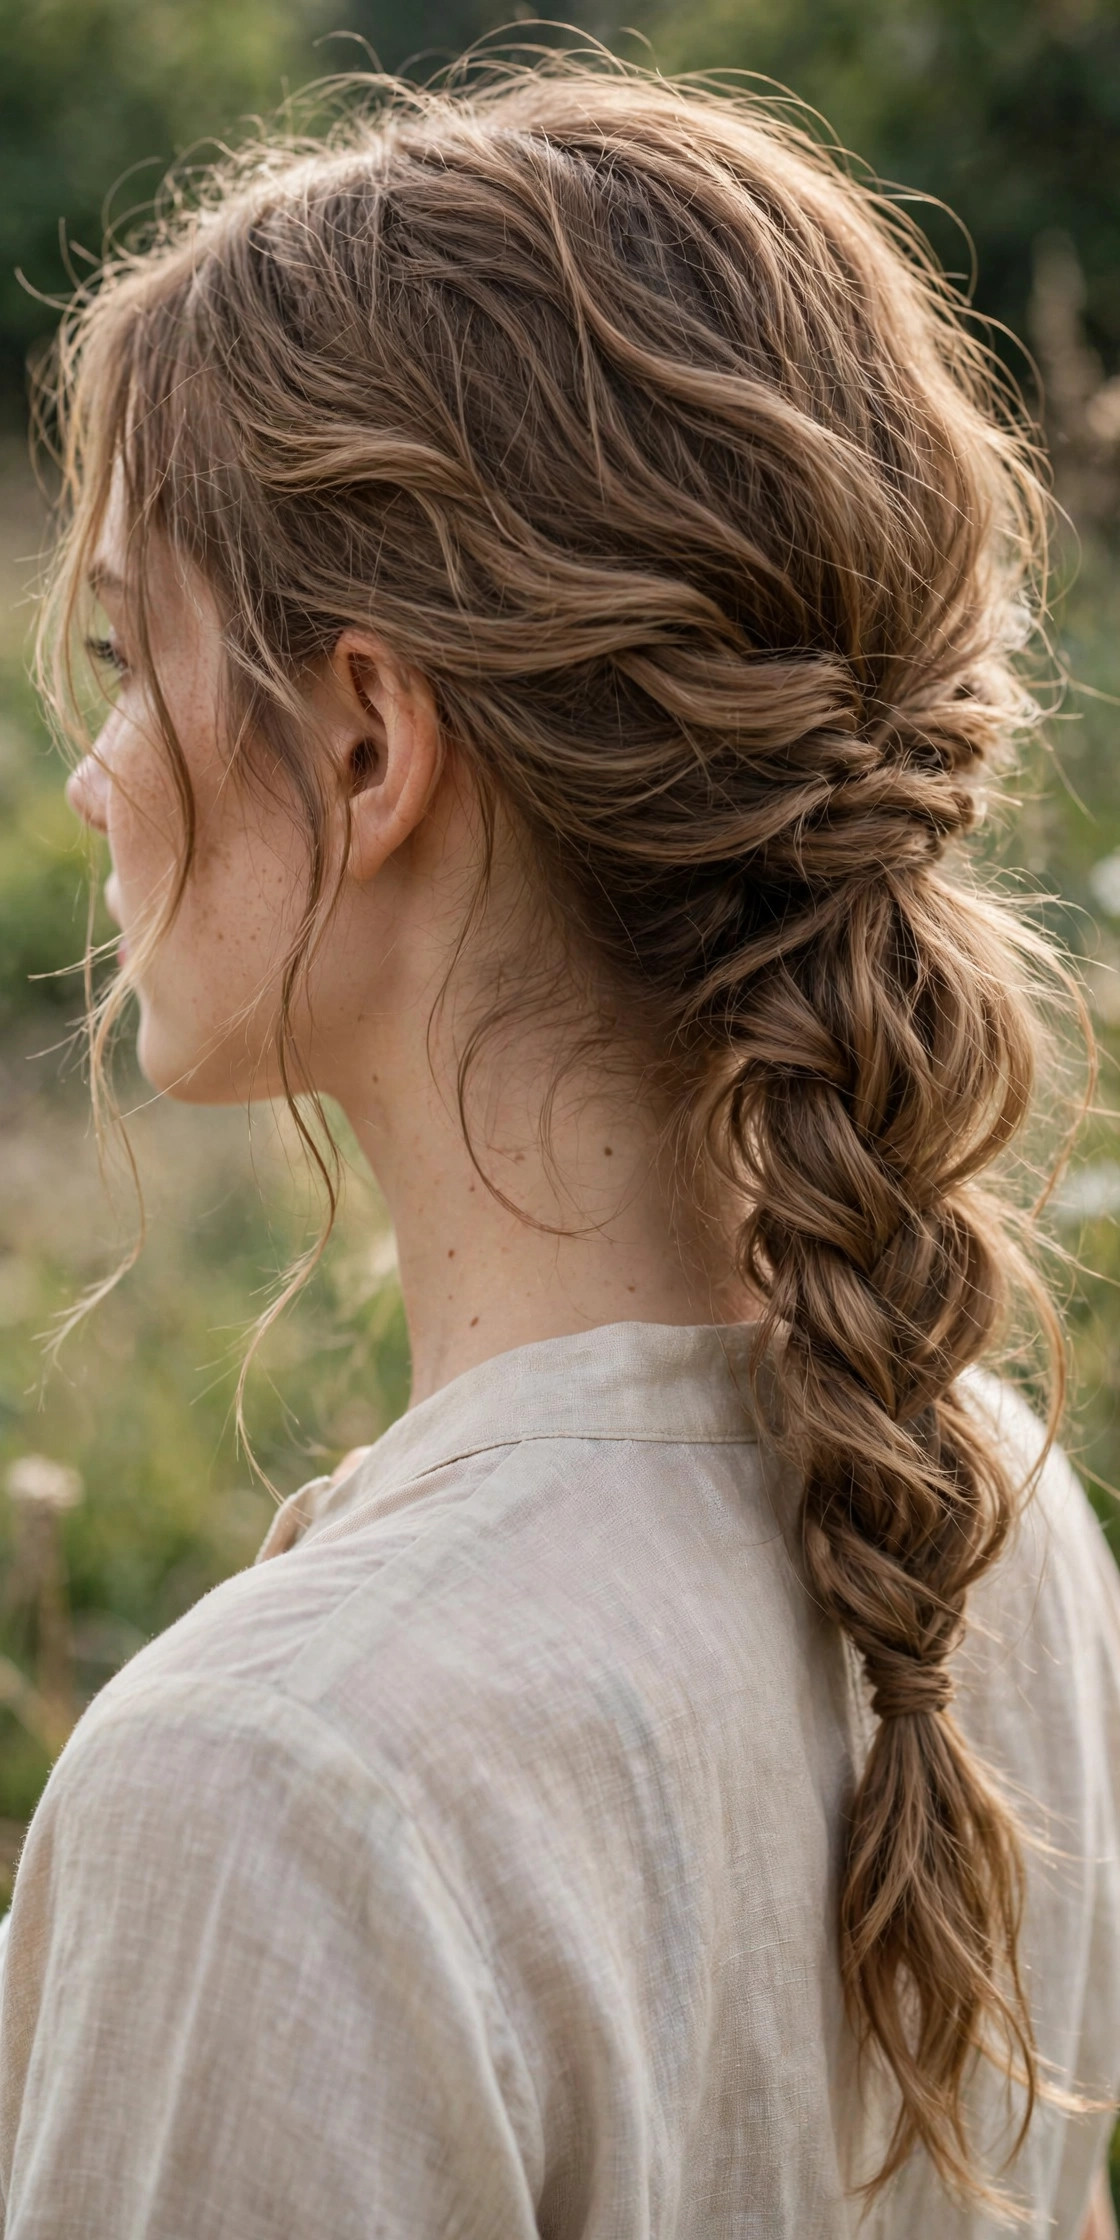
4. The Boho Loose Braid Ponytail
The boho braided ponytail is deliberately imperfect: a loose, low ponytail with a soft three-strand or fishtail braid, face-framing pieces pulled free, and texture everywhere. It’s the hairstyle equivalent of an off-duty model — effortless, romantic, and forgiving on second- or third-day hair, which actually holds the braid better. It suits every face shape because the softness around the face is customizable, and it’s perfect for brunch, beach days, and casual weddings.
Build it on dry hair with a wave or bend already in it (a curling wand on random sections works). Gather hair loosely at the nape, braid loosely without pulling tight, and tie off. Then pancake aggressively — pull the braid edges wide — and tug out wisps around the temples and ears. A light-hold texturizing spray keeps it airy. Variation: weave a thin ribbon or a few small wildflowers into the braid for festival season.
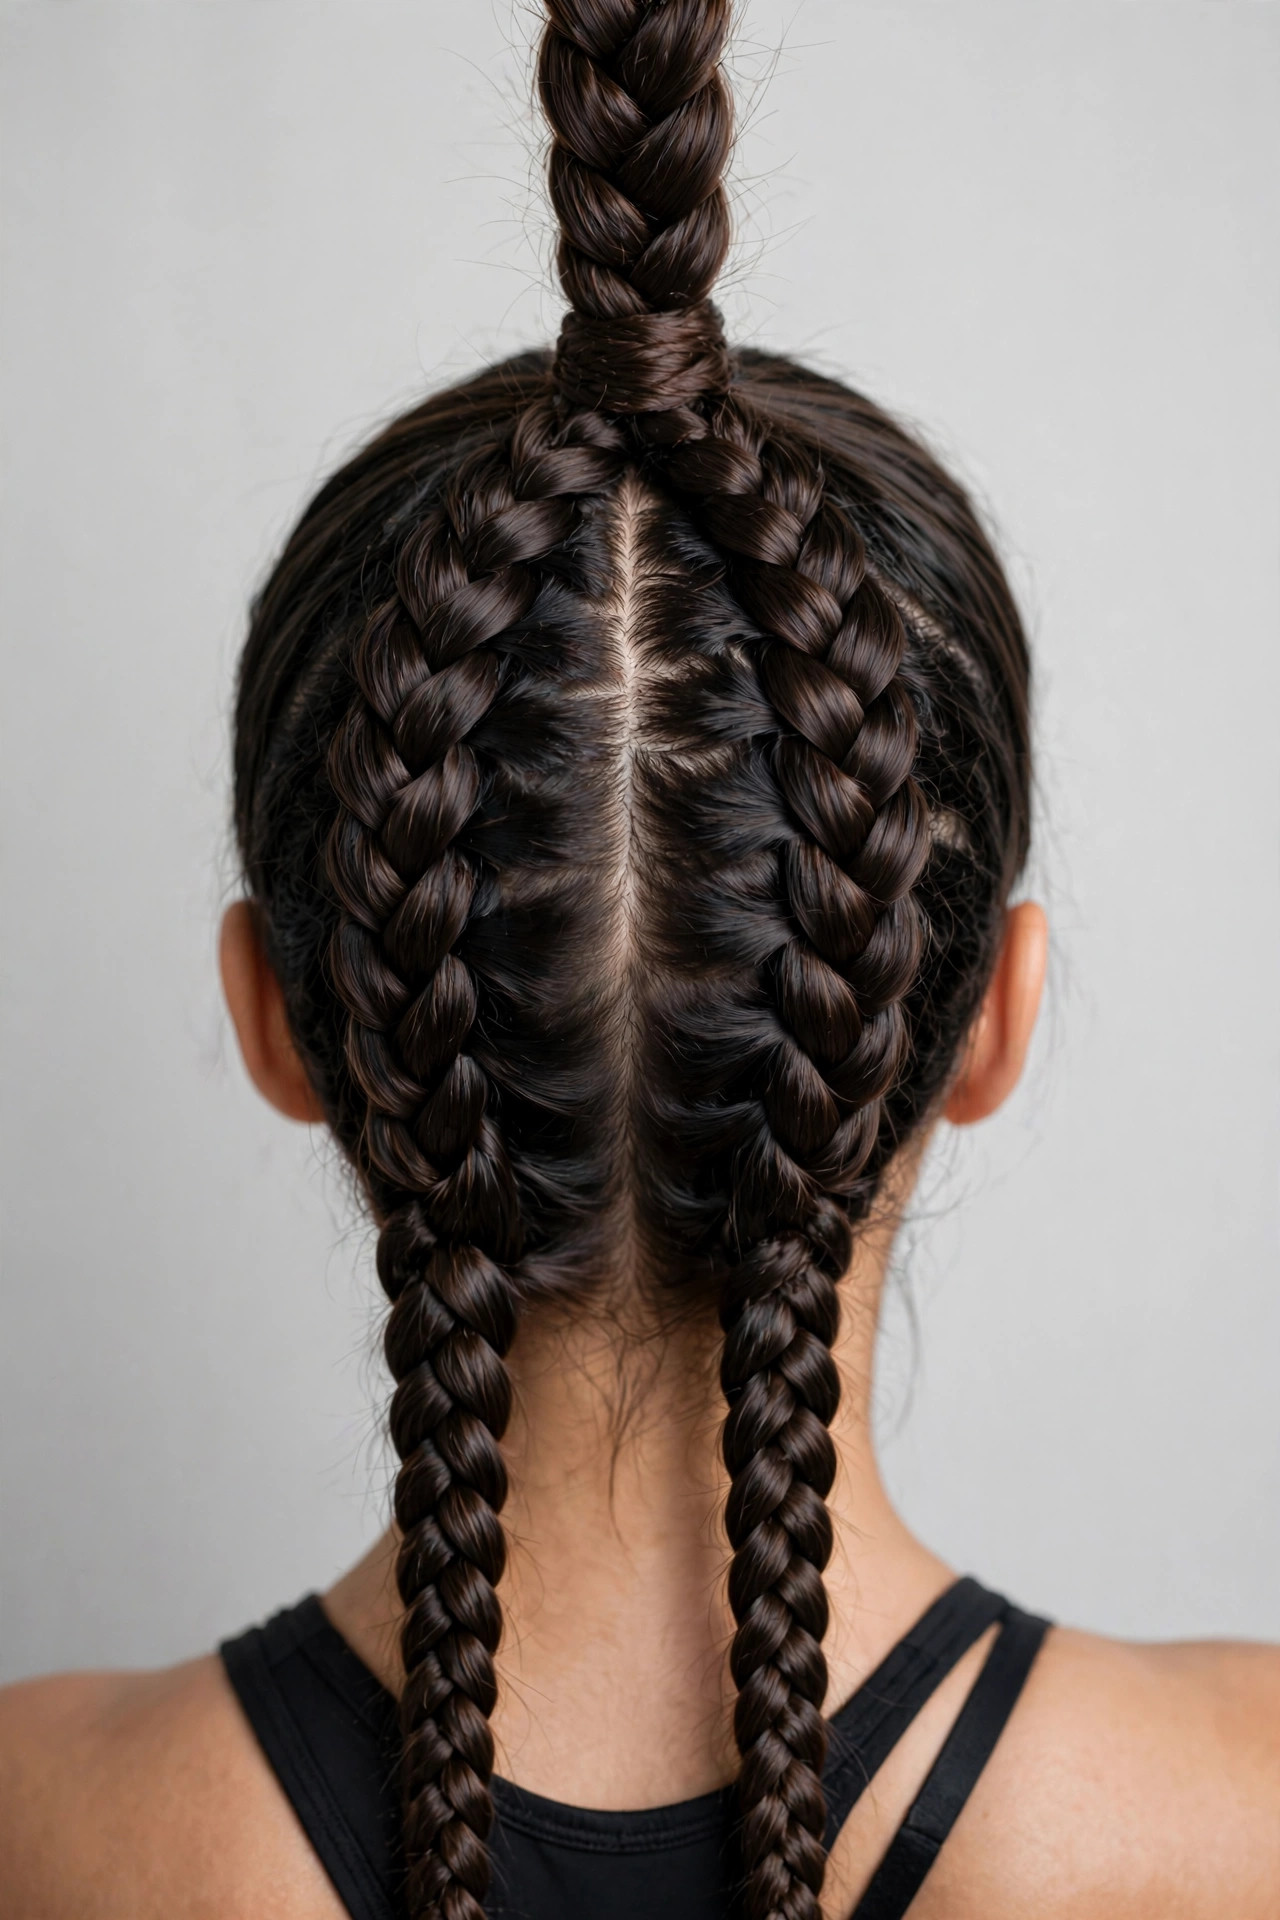
5. The Double Dutch Braid Into One Ponytail
Two Dutch braids running from the temples back and merging into a single ponytail — this is the boxer-braid look, and it’s the most secure braided ponytail here. Because the braids are anchored to the scalp all the way back, nothing shifts, which makes it ideal for running, cycling, swimming, and humid climates. It flatters wide and square faces by adding height at the crown, and it reads sporty-cool rather than precious.
Part hair cleanly down the middle first — a rattail comb gives the sharpest line. Dutch-braid each side from the front hairline back to the crown, keeping the braids close to the part for symmetry. Gather both braids plus all remaining hair into one ponytail at the crown. Variation: continue the ponytail itself as a three-strand braid, or leave it sleek and straight for contrast against the textured braids.

6. The Wrapped French Braid Ponytail
A classic French braid runs from the crown down, then the tail wraps around the base of the ponytail to hide the elastic — an old red-carpet trick that makes a simple style look expensive. The French braid (strands crossed over) sits flatter and smoother than a Dutch braid, so this version is the most polished and office-appropriate of the list. It suits fine to medium hair best, since the smooth finish shows off shine, and it works for job interviews, presentations, and formal dinners.
Start the French braid slightly behind the hairline rather than right at it — this keeps the front smooth and avoids a bumpy hairline. Braid to the nape, secure, then take the remaining tail, wrap it around the ponytail base, and pin underneath with bobby pins. Finish with a shine spray. Variation: wrap with a velvet ribbon or a gold hair cuff instead of your own hair for evening events — it pairs beautifully with formal looks like a gold prom dress.

7. The Feed-In Cornrow Braid Ponytail
Feed-in braids are the protective-style answer to the braided ponytail: cornrows braided close to the scalp with extension hair gradually “fed in” so the braid starts thin and natural at the hairline and thickens toward the back — no bulky knot at the front. The braids sweep back into a long, full ponytail (add braiding hair for length). It’s stunning on natural and relaxed hair textures, lasts one to three weeks with care, and suits every face shape since the sleek scalp braiding defines the hairline.
This one is worth booking a braider for if you’re new to cornrowing, but the DIY version starts with clean, stretched hair and edge control. Part into your chosen pattern (straight-back, curved, or a side part with a swoop), feed in small pieces of braiding hair as you cornrow back, and gather into a high or mid ponytail. Wrap the base with hair. At night, tie down with a silk scarf to keep it fresh. Variation: add gold cuffs or beads along the braids for a special occasion.

8. The Curly Ponytail with a Dutch Braid Crown
Curly and coily hair gets the best of both worlds here: a Dutch braid across the crown or along one side, melting into a big, free curly ponytail. The braid controls the front (no frizz halo in photos) while the curls do the talking in back. It’s especially flattering on round and heart-shaped faces — the crown braid adds height while the volume at the back balances the chin. Wear it to parties, date nights, and anywhere you want your natural texture to shine.
Work on stretched or blown-out roots for the easiest braiding, but leave the lengths in their natural curl pattern. Dutch-braid from one temple across to the opposite side (or straight back from the hairline), then gather everything into a ponytail at the crown, letting curls cascade. Fluff the ponytail with an afro pick and define a few front pieces with curl cream. Variation: two parallel Dutch braids across the crown for extra detail.

9. The Low Side Braided Ponytail
Sweep everything to one side and braid low over the shoulder — the side braided ponytail is the softest, most romantic placement on this list. Wearing the ponytail over one shoulder draws the eye diagonally, which is flattering on long faces and strong jawlines, and the asymmetry photographs beautifully in profile. It’s a wedding-guest and prom favorite, and it transitions straight from ceremony to dance floor.
Gather hair behind the ear on your chosen side (a deep side part on the opposite side adds drama). Braid loosely — Dutch for texture, fishtail for romance — and tie off. Pull the braid wide and tug out soft pieces around the face. Secure any flyaways with a light-hold spray rather than a hard gel so it moves. Variation: start with a small Dutch braid at the temple on the heavy side, feeding into the main side braid for a more intricate finish — gorgeous with formal dresses like a silver prom dress.
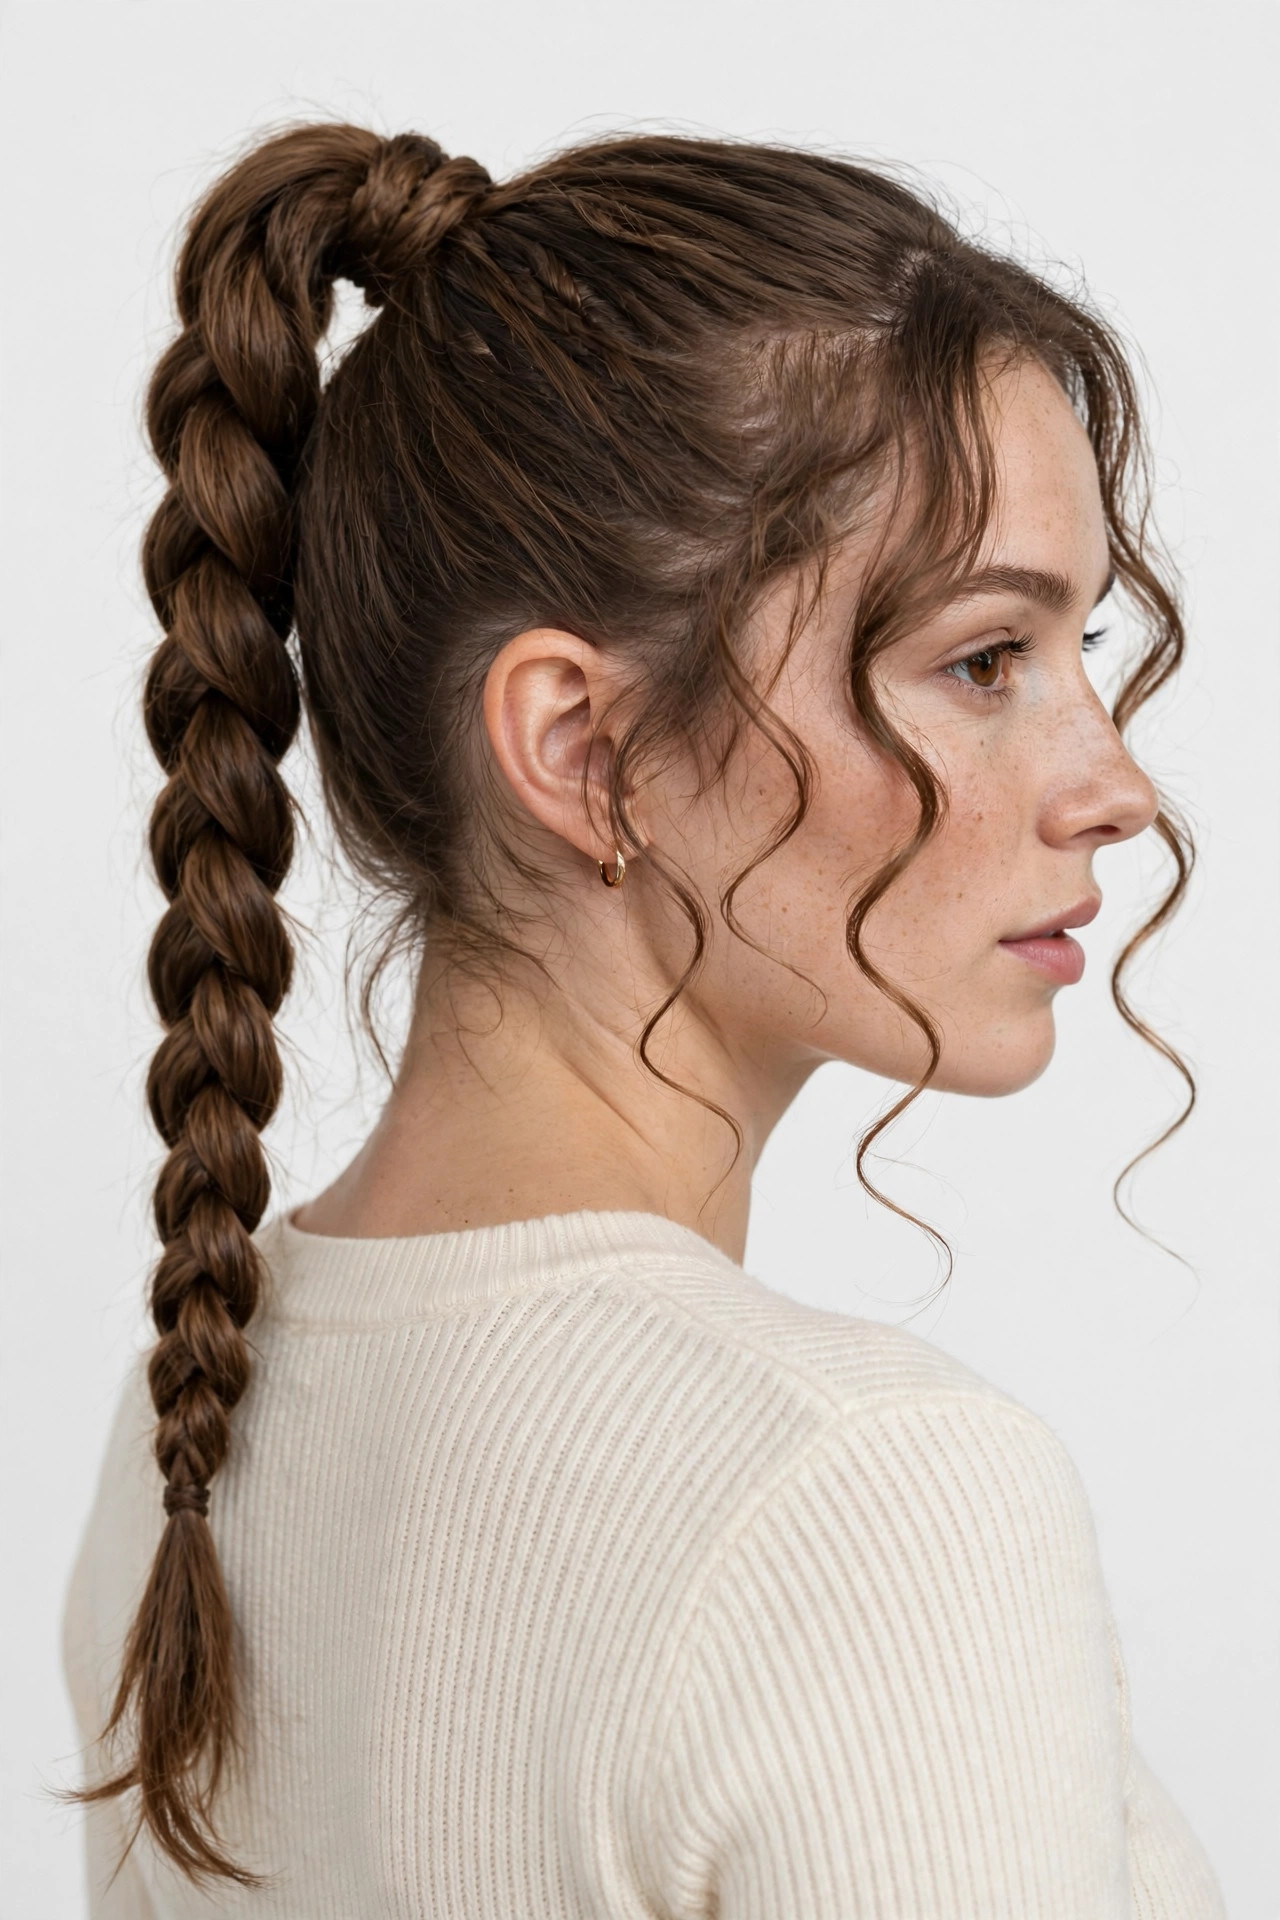
10. The Braided Ponytail with Face-Framing Pieces
Sometimes the difference between “gym hair” and “style” is two small pieces of hair. This look is any braided ponytail — Dutch, French, or fishtail — worn with soft, face-framing strands left out at the front. The pieces soften the hairline, flatter square and heart-shaped faces by breaking up a strong forehead or jaw, and make a high ponytail feel intentional rather than severe. It’s the everyday version you’ll actually wear on repeat.
The trick is cutting (or styling) the pieces to the right length: they should hit between the cheekbone and jawline. Pull them out after the ponytail is secured, then curl them away from the face with a wand or flat iron for a soft bend. If your hair is one length, create the pieces by leaving out the front inch on each side before you start braiding. Variation: braid the face-framing pieces themselves into two tiny accent braids for a Y2K-inspired twist.
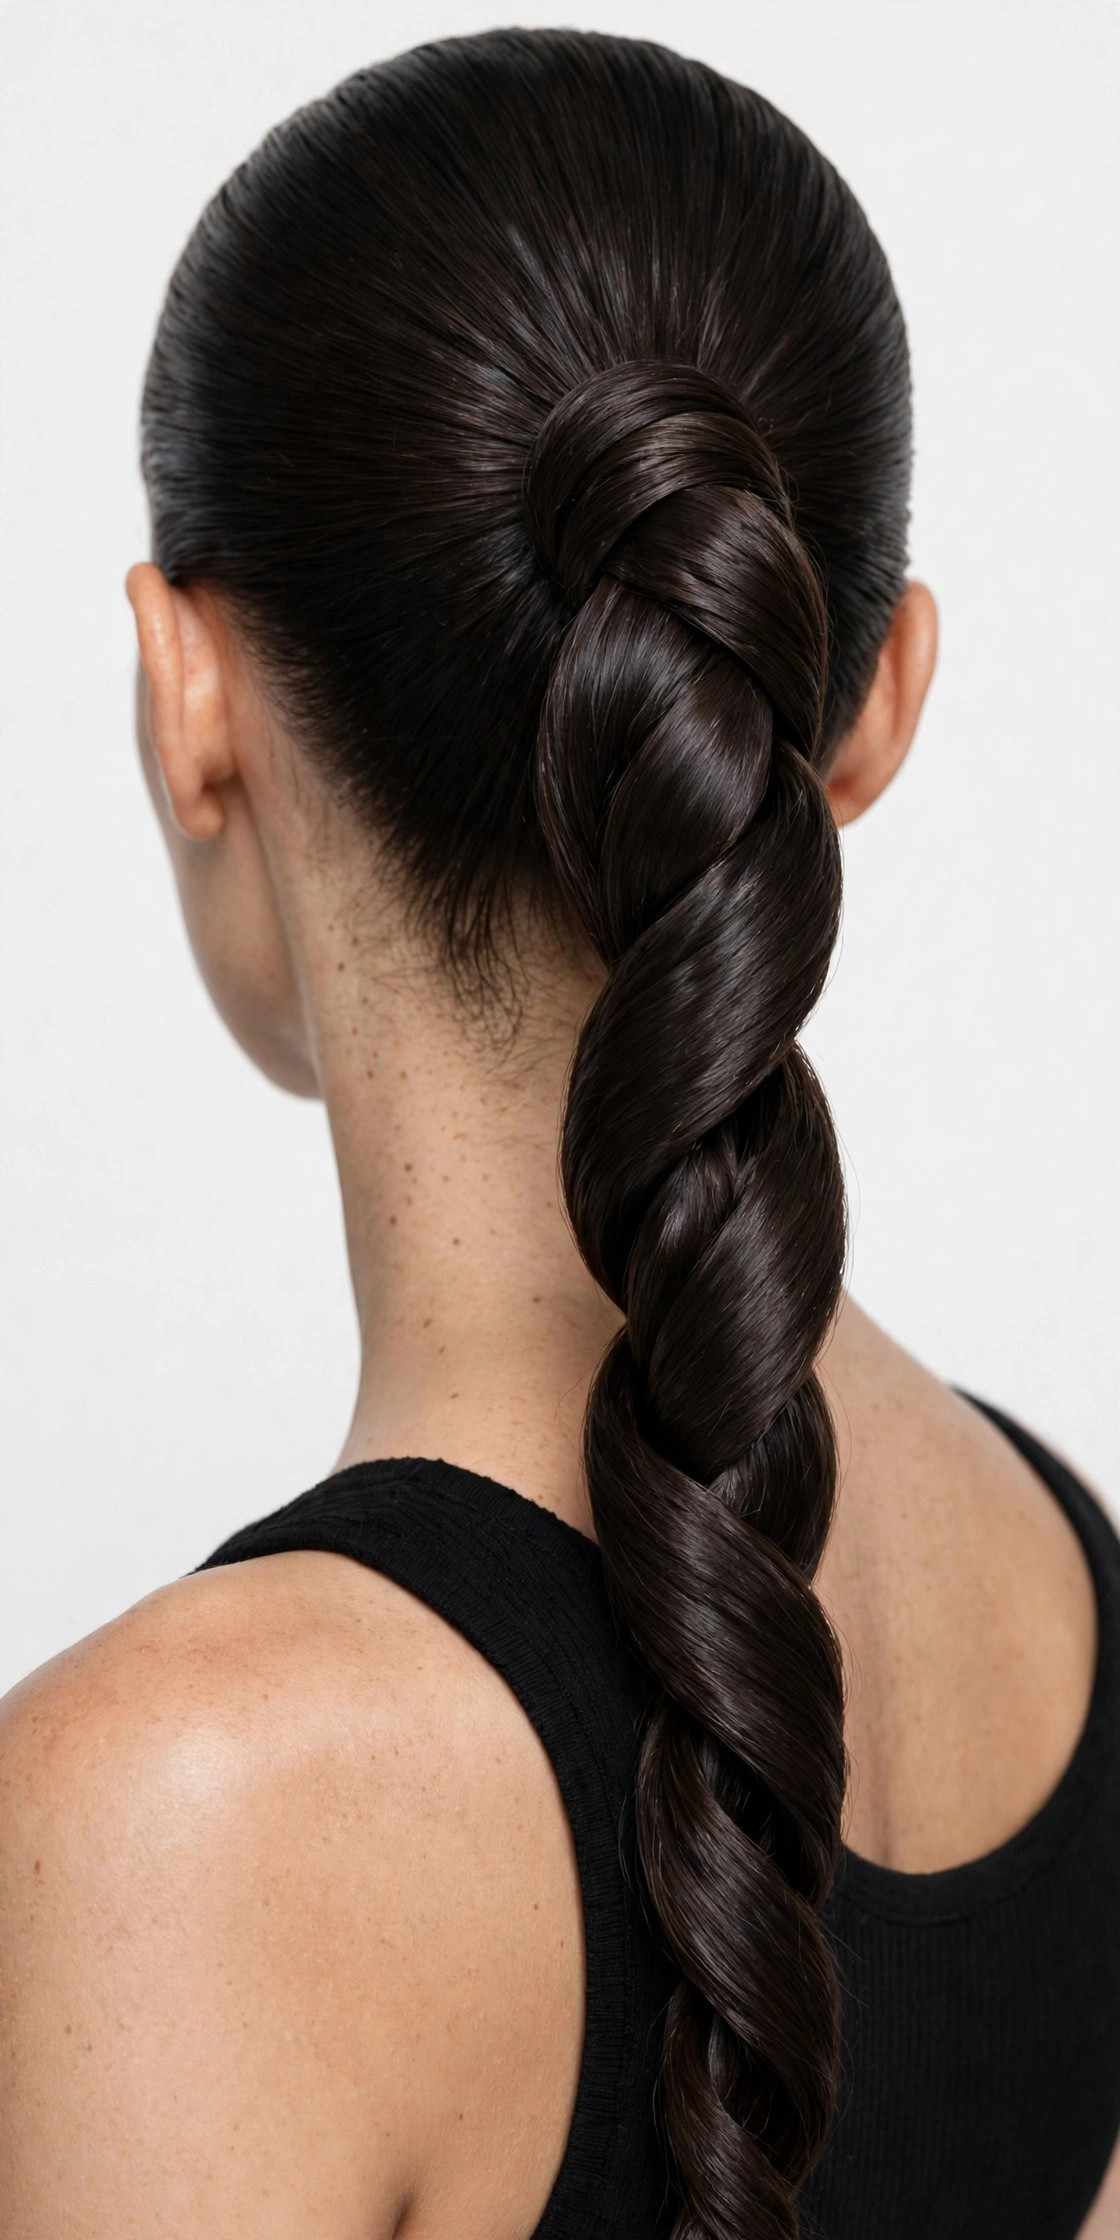
11. The Rope-Twist Braid Ponytail
A rope twist uses only two strands twisted in the same direction, then wrapped around each other in the opposite direction — the opposing tension is what locks it in place. Done on a ponytail, it creates a sleek, sculptural twist that looks completely different from a regular braid and takes about three minutes. It works best on medium to long hair with some grip (day-old hair or texturizing spray), suits oval and oblong faces, and is perfect for work, travel days, and hot weather.
Split the ponytail into two equal sections. Twist each section clockwise individually, then wrap them counterclockwise around each other all the way down — keep the tension firm or it will unravel. Tie off with a clear elastic. Because there’s no added hair, this twist lies flatter than a braid, so pancake it gently if you want more volume. Variation: do two rope twists (half-up sections) that join into one ponytail for a more detailed crown.
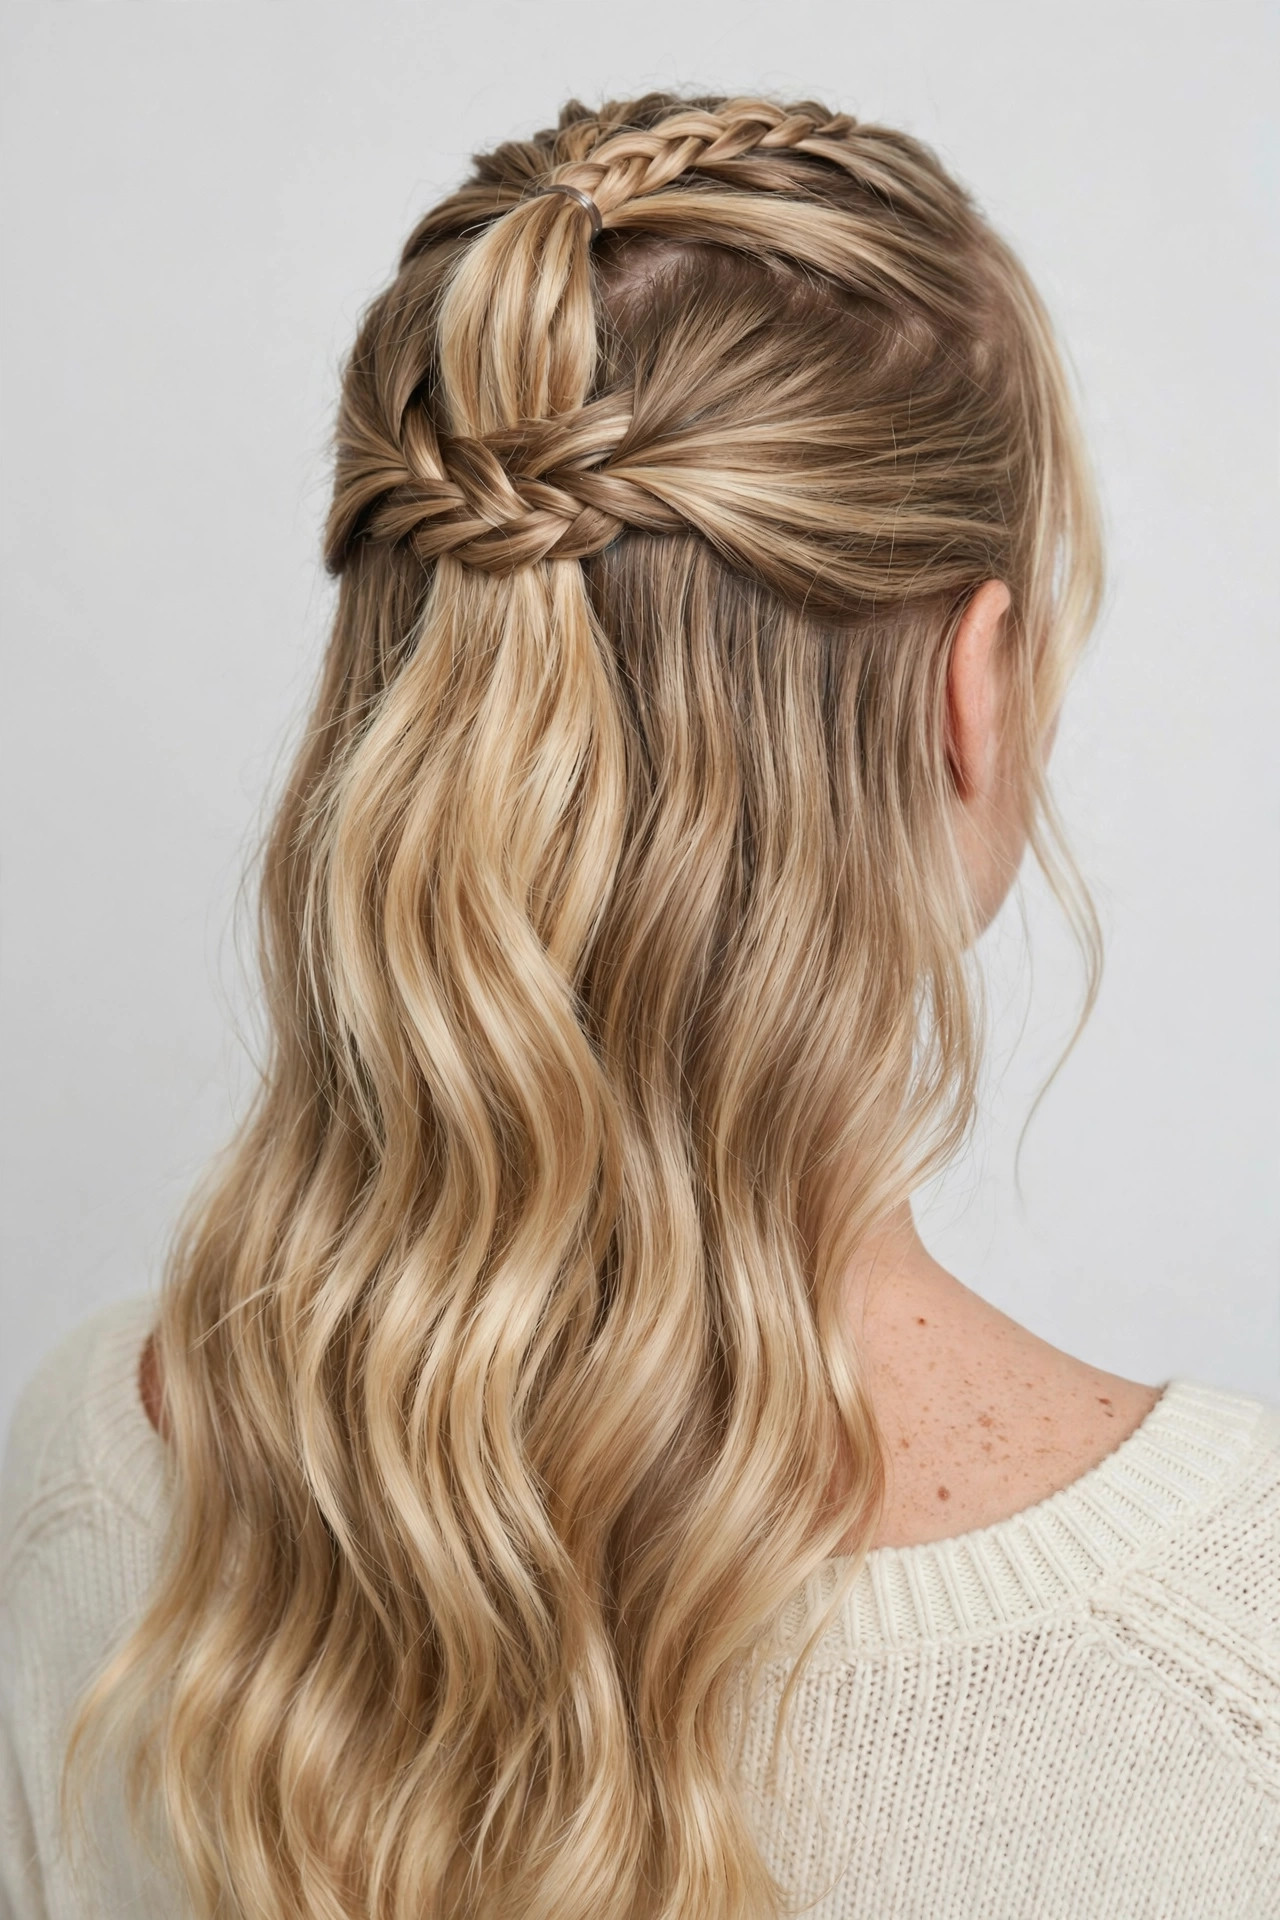
12. The Half-Up Braided Ponytail
The half-up braided ponytail gives you the polish of an updo with the ease of wearing your hair down: a Dutch or French braid across the crown, gathered into a small ponytail at the back of the head, while the rest flows free. It’s the most versatile placement here — it keeps hair out of your face without committing to a full ponytail — and it flatters fine hair because the braid adds visible texture at the crown. Wear it to the office, on dates, and to outdoor events where wind is a factor.
Section off the top third of your hair from temple to temple. Dutch-braid it straight back (or angle two braids from each temple to meet in the middle), stopping at the crown, and secure with a small clear elastic. Let the remaining hair fall naturally — add waves for extra romance. Hide the elastic by wrapping a strand around it. Variation: continue the half-up ponytail into a bubble braid or fishtail for a statement back view.

13. The Chunky Pull-Through Braid Ponytail
The pull-through braid looks like a chunky Dutch braid but is built entirely from stacked ponytails — you split each ponytail section, pull the next one through, and repeat. The result is a thick, dimensional “braid” that’s actually easier than real braiding and holds better in fine or slippery hair. It’s the best choice for thin hair that won’t grip a traditional braid, adds major volume, and suits anyone who struggles with braiding technique. It shines at parties and in photos where the chunky texture reads from far away.
Start with a high ponytail. Take a small section from the top, tie it with a clear elastic a few inches down, split it, and pull the remaining ponytail up through the split. Repeat down the length, keeping sections even. Then pancake each “link” wide — this is what creates the chunky effect. The more you pull apart, the thicker it looks. Variation: use colored mini elastics or thread a ribbon through the links for a playful accent.

14. The Braided Ponytail with a Scarf or Ribbon
Tying a scarf or ribbon at the base of a braided ponytail is the fastest way to make the style feel finished — it hides the elastic, adds color and movement, and takes ten seconds. A silk scarf reads elegant and works for weddings and evenings; a grosgrain ribbon reads preppy and cute for daytime. It suits every hair type and face shape because the accessory, not the braid, carries the style. It’s also the perfect fix when your braid didn’t turn out perfect — the scarf distracts beautifully.
Braid your ponytail as usual (a simple three-strand or fishtail shows the scarf best), tie off, then loop the scarf around the base and knot it, letting the ends hang down alongside the braid. For extra polish, weave a thin ribbon through the braid itself as you go. Match the scarf to your outfit — a red scarf with a holiday party outfit is a classic December combination. Variation: use a scrunchie-style scarf (a scrunchie with scarf tails attached) for a one-step version.
Frequently Asked Questions
How do you do a Dutch braid ponytail for beginners?
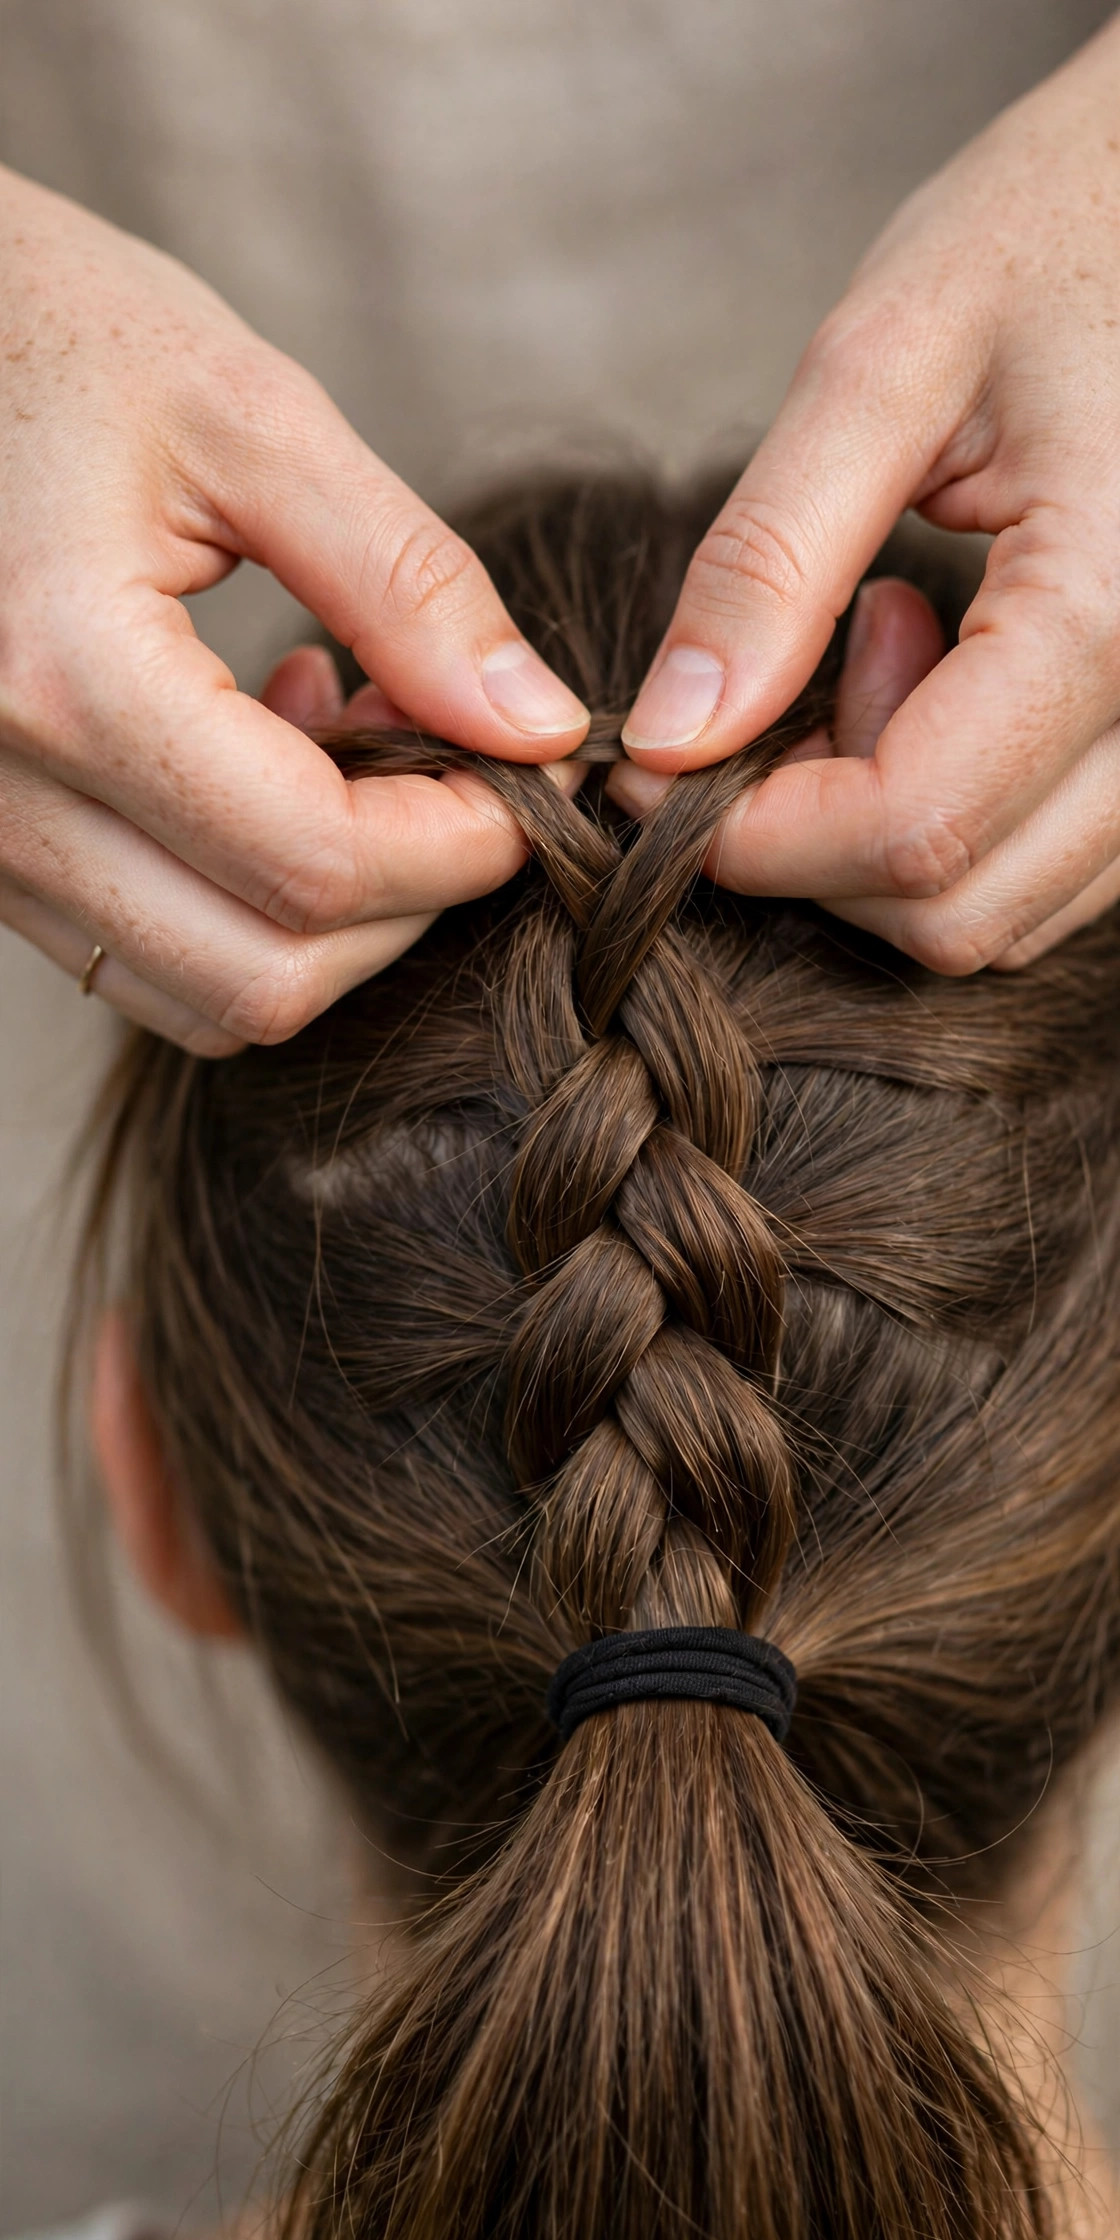
Start with brushed, detangled hair. Gather the front section at your hairline and divide it into three strands. Cross each side strand UNDER the middle strand (not over — that’s the Dutch difference), adding a section of hair to each side strand before every cross. Keep going straight back to the crown, then gather everything into a ponytail. Practice on slightly damp hair with a bit of styling cream — it grips better and the braid looks neater while you’re learning.
What is the difference between a Dutch braid and a French braid?
The only difference is the direction you cross the strands: in a French braid, side strands cross OVER the middle, so the braid sinks into the hair and looks flat and smooth. In a Dutch braid, side strands cross UNDER the middle, so the braid sits on top of the hair and looks raised and 3D. Dutch braids photograph with more texture and edge; French braids look sleeker and more classic. Both feed into a ponytail the same way.
How do I make my braided ponytail last all day?
Four things: start with hair that has some grip (day-old hair, dry shampoo, or texturizing spray — freshly washed hair slips); use clear mini elastics at every anchor point, not just the end; set the finished style with a flexible-hold hairspray; and carry two bobby pins for touch-ups. For workouts or humid days, choose scalp-anchored styles like the double Dutch braid — braids attached to the head barely move.
Which braided ponytail is best for thin or fine hair?
The bubble braid and the pull-through braid are the two best fakes for fine hair — both create volume through technique rather than relying on hair density. Prep with a volumizing mousse at the roots and a texturizing spray through the lengths before you start. Avoid tight, sleek styles that expose the scalp; instead, pancake every braid wide and finish with a light dusting of texturizing powder at the crown for extra fullness.
Conclusion
A braided ponytail earns its place as a forever hairstyle because it’s three things at once: practical, pretty, and endlessly variable. Whether you go sleek and high with a Dutch braid, romantic with a fishtail, or playful with bubbles, the formula is the same — a braid for texture, a ponytail for polish. Pick the version that matches your hair type and your plans, save your favorite, and wear it on repeat.
Leave a Reply